

Our irresistible homemade enchiladas are not just a meal; they’re an experience that will transport your taste buds straight to the heart of Mexico. With a perfect blend of savory chicken, gooey cheese, and a rich, homemade enchilada sauce, this dish is bound to become a staple in your recipe repertoire. Whether you’re a seasoned chef or a kitchen novice, our step-by-step guide will ensure you create restaurant-quality enchiladas right in your own home.
The Secret to Perfect Enchiladas: Homemade Sauce
The heart and soul of any great enchilada dish lies in its sauce. While it might be tempting to reach for a store-bought can, nothing compares to the rich, complex flavors of a homemade enchilada sauce. Our recipe strikes the perfect balance between tangy tomatoes, smoky chilies, and aromatic spices, creating a sauce that will elevate your enchiladas from good to absolutely unforgettable.
Making your own sauce allows you to control the heat level and adjust the flavors to your liking. Plus, it’s surprisingly simple to whip up. With just a few pantry staples and about 15 minutes of your time, you’ll have a sauce that puts any store-bought version to shame. The depth of flavor it adds to your enchiladas is truly incomparable.
For those who love to meal prep, this sauce can be made in large batches and frozen for future use. It’s not just great for enchiladas – try it as a topping for burritos, a base for chili, or even as a zesty dip for chips. Once you’ve tasted the difference, you’ll never go back to canned sauce again.
Tip: To achieve the perfect consistency, simmer your sauce until it coats the back of a spoon. This ensures it will cling to your enchiladas rather than pooling at the bottom of the dish.
To make your enchilada-making process even smoother, consider investing in a high-quality immersion blender. This handy tool allows you to blend your sauce directly in the pot, saving you time and reducing cleanup. Plus, it’s versatile enough to use for soups, smoothies, and many other kitchen tasks.
Remember, the key to a great sauce is balance. Don’t be afraid to taste and adjust as you go. A pinch more salt, a dash of cumin, or an extra splash of vinegar can make all the difference in creating a sauce that’s truly your own.
Mastering the Art of Enchilada Assembly
Now that you’ve got your mouthwatering sauce ready, it’s time to dive into the heart of enchilada-making: the assembly process. This is where you can let your creativity shine and customize your enchiladas to suit your tastes. Our recipe calls for a classic chicken filling, but don’t let that limit you – vegetarians can swap in black beans and roasted vegetables for an equally delicious meat-free version.
The key to perfect enchiladas lies in the tortillas. While both corn and flour tortillas work well, traditionalists swear by corn for its authentic flavor and texture. To prevent your tortillas from cracking when you roll them, try this pro tip: warm them slightly before assembly. You can do this by wrapping them in damp paper towels and microwaving for 30 seconds, or by giving them a quick dip in hot oil.
When it comes to filling your enchiladas, remember that less is often more. Overstuffing can lead to difficult rolling and potential splitting. Aim for about 2-3 tablespoons of filling per tortilla, spread in a line down the center. This ensures easy rolling and even distribution of flavors in every bite.
Tip: For picture-perfect enchiladas, place them seam-side down in your baking dish. This not only keeps them from unrolling but also gives you a smooth surface for that final layer of sauce and cheese.
To make your enchilada assembly even easier, consider using a baking dish with a tight-fitting lid. This allows you to prepare your enchiladas in advance and store them in the refrigerator until you’re ready to bake. It’s a game-changer for busy weeknights or when you’re entertaining guests.
The Grand Finale: Baking and Serving
As your enchiladas bake, your kitchen will be filled with an irresistible aroma that will have everyone eagerly anticipating dinner. The magic happens in the oven, where the flavors meld together, the cheese becomes perfectly melty, and the edges of the tortillas crisp up for that delightful textural contrast.
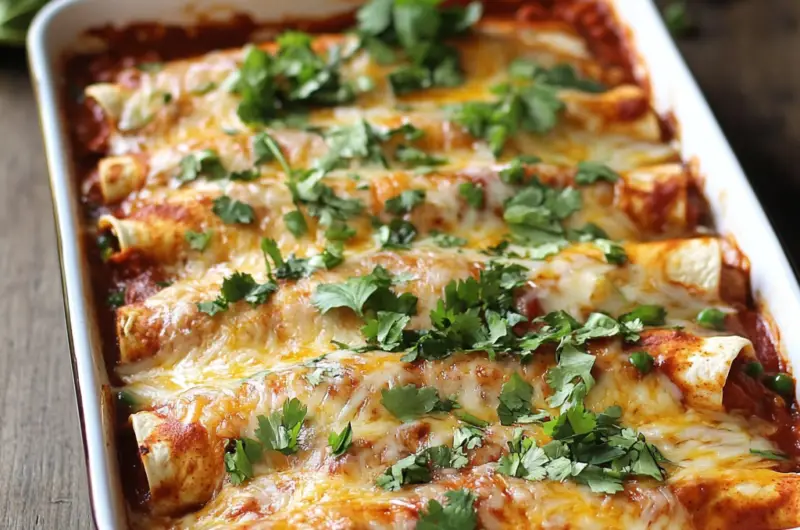
While it might be tempting to dig in right away, patience is key. Letting your enchiladas rest for 5-10 minutes after baking allows the flavors to settle and makes them easier to serve without falling apart. Use this time to prepare your toppings and sides. Fresh cilantro, diced onions, sliced avocado, and a dollop of sour cream are all classic choices that add freshness and contrast to the rich, savory enchiladas.
For a truly memorable meal, consider pairing your enchiladas with some traditional Mexican side dishes. A simple black bean and corn salad or a zesty Mexican rice can round out the meal perfectly. And don’t forget the drinks! A frosty margarita or a crisp Mexican beer can be the perfect complement to your spicy, cheesy enchiladas.
Tip: For a fun twist on traditional serving, set up an enchilada bar with various toppings and let your guests customize their plates. It’s a great way to accommodate different tastes and dietary restrictions.
To keep your enchiladas warm throughout dinner, consider investing in a food warmer tray. This handy gadget ensures that second (and third!) helpings are just as delicious as the first.
Remember, the beauty of homemade enchiladas lies in their versatility. Don’t be afraid to experiment with different fillings, cheeses, or even sauces. Green enchilada sauce, for example, offers a tangy, slightly milder flavor profile that’s equally delicious. The more you make this recipe, the more you’ll discover your own perfect combinations.
With this recipe in your culinary arsenal, you’re well on your way to becoming the go-to enchilada expert among your friends and family. These irresistible homemade enchiladas are more than just a meal – they’re a celebration of flavor, a comfort food classic, and a surefire way to bring smiles to the dinner table. So roll up your sleeves, preheat that oven, and get ready to create a dish that will have everyone begging for your secret recipe. Who knows? You might just start a new weekly tradition: Enchilada Night!
Irresistible Homemade Chicken Enchiladas
Course: Main CourseCuisine: Mexican6
servings30
minutes25
minutes450
kcal55
minutesDive into a world of flavor with these easy-to-make, customizable enchiladas that will have you coming back for seconds every time.
Ingredients
2 cups shredded cooked chicken
12 corn tortillas
2 cups shredded cheese (mix of cheddar and Monterey Jack)
1 can (15 oz) black beans, drained and rinsed
1 small onion, diced
1 can (4 oz) diced green chiles
3 cups homemade enchilada sauce
2 tablespoons vegetable oil
Salt and pepper to taste
Directions
- Preheat your oven to 375°F (190°C). While the oven is heating, prepare your enchilada sauce if you haven’t already. In a large bowl, mix together the shredded chicken, half of the cheese, black beans, diced onion, and green chiles. Season this mixture with salt and pepper to taste, ensuring all ingredients are well combined.
- In a large skillet, heat the vegetable oil over medium heat. Once hot, briefly fry each corn tortilla for about 10 seconds on each side. This step is crucial as it makes the tortillas pliable and prevents them from cracking when rolled. After frying, place the tortillas on a paper towel-lined plate to drain excess oil.
- Spread about 1/2 cup of the enchilada sauce in the bottom of a 9×13 inch baking dish. Take a fried tortilla and dip it in the enchilada sauce, making sure both sides are lightly coated. Place about 2-3 tablespoons of the chicken mixture down the center of the tortilla and carefully roll it up. Place the filled tortilla seam-side down in the baking dish. Repeat this process with the remaining tortillas and filling.
- Once all the enchiladas are in the baking dish, pour the remaining enchilada sauce over the top, making sure to cover all the tortillas. This prevents them from drying out during baking. Sprinkle the remaining cheese evenly over the top of the sauce-covered enchiladas.
- Cover the baking dish with aluminum foil and place it in the preheated oven. Bake for 20 minutes, then remove the foil and bake for an additional 5-10 minutes, or until the cheese is melted and bubbly, and the edges of the tortillas are slightly crispy.
- Remove the enchiladas from the oven and let them rest for 5-10 minutes before serving. This resting period allows the flavors to meld and makes the enchiladas easier to serve without falling apart. While waiting, prepare your desired toppings such as chopped cilantro, diced onions, sliced avocado, or a dollop of sour cream.
- Serve the enchiladas hot, garnished with your choice of toppings. For a complete meal, consider serving with a side of Mexican rice or a fresh green salad. Enjoy your homemade enchiladas while they’re still warm and gooey!
Notes
- For the best flavor, use homemade enchilada sauce. If using store-bought, consider adding some extra spices to enhance the flavor.
- You can prepare the enchiladas ahead of time and refrigerate them before baking. Just add an extra 10-15 minutes to the baking time if cooking from cold.
- For a vegetarian version, replace the chicken with roasted vegetables like bell peppers, zucchini, and corn.
Frequently Asked Questions
Q: Can I use flour tortillas instead of corn tortillas for my enchiladas?
A: While you can use flour tortillas, corn tortillas are traditionally used for enchiladas and provide a more authentic flavor and texture. Corn tortillas also hold up better to the sauce and filling without becoming soggy. If you prefer flour tortillas, be aware that they may become softer and potentially fall apart more easily when covered in sauce.
Q: How can I prevent my enchiladas from becoming soggy?
A: To prevent soggy enchiladas, try these tips: 1) Lightly fry the tortillas in oil before filling them, which creates a barrier against the sauce. 2) Don’t oversauce your enchiladas before baking. 3) Ensure your filling isn’t too wet. 4) Bake the enchiladas uncovered for the last few minutes to crisp up the edges. 5) Let the enchiladas rest for 5-10 minutes after baking to allow the sauce to set.
Q: Can I make enchiladas ahead of time?
A: Yes, enchiladas are great for make-ahead meals! You can assemble the enchiladas, cover them tightly with plastic wrap or aluminum foil, and refrigerate for up to 24 hours before baking. When you’re ready to cook, remove them from the refrigerator about 30 minutes before baking to take the chill off, and add 10-15 minutes to the baking time. You can also freeze unbaked enchiladas for up to 3 months – just thaw in the refrigerator overnight before baking.
Q: What are some good side dishes to serve with enchiladas?
A: Enchiladas pair well with a variety of side dishes. Some popular options include: 1) Mexican rice or cilantro-lime rice. 2) Refried beans or black beans. 3) A simple green salad with a lime vinaigrette. 4) Grilled corn on the cob with chili and lime. 5) Guacamole and tortilla chips. 6) Pico de gallo or fresh salsa. For a complete fiesta, you could also serve a refreshing beverage like horchata or a classic margarita.